Wednesday 31 August 2011

A Way to Clean Makeup Brushes

Hello my amazing readers! How was your day? I hope it was good. Today be short, but it will not be a short summary of my busy day either. I realized that I have not done a makeup brush cleaning tutorial yet, but today seems like the right day to do so. Onto today’s post!


Bear with me, as I decided to use my lower quality camera. Cleaning brushes is something most of you might have to do. If you decide to use it, you have to clean it. It doesn’t matter how often you use the brush, I recommend cleaning it every few days to a week. Bacteria can reside in your brushes, and can cause your skin to break out into spots if you do not take care of these tools. Today I am going to explain to you how I clean my brushes.


First Step: Using a good eye makeup remover, squirt a suitable amount onto a cotton pad.


Second Step: Gently swirl the brush in the makeup remover, and discard the cotton pad when it becomes too soiled. Repeat these two steps until the brush comes off clean, with no makeup product left on the pad.


Third Step: Wet the brush under a tap, and place a small bead of shampoo onto the bristles. Lather the shampoo, and work the shampoo through the hairs on the brush. Rinse the brush, and repeat if necessary.


Last Step: Take a small hand towel, and roll up one end, about a third of the way. Place the brush leaning against the rolled up end, ferule down, and handle up. Let it dry for a few hours.


Well there you go! I hope you may use this in the future. It is cheaper to use than a brush cleaner, and in my opinion, it will do a better job than shampoo and olive oil as an alternative to a brush cleaner. Thank you for reading, and have a nice day.

Happy Brush Cleaning


^_^

Monday 29 August 2011

Very Short Message :)

Hello my avid readers! How are you doing? Tomorrow I have two tutorials planned,but don't worry, I won't reveal them yet. You just have to wait a bit longer. Until then, have fun, be safe, and thanks for reading this irrationally short post.


Happy Waiting


^_^


Back to School

Good evening my wonderful readers! How are you doing? My first day at school was today, and boy, it was pretty bittersweet. I already have homework to do, but at least its easy assignments. How did your first days back go? Check back later today, as I should have a post up. Right now, I am finishing homework, which a lot of you are probably doing too. Good luck, and try getting to bed early. ;D


Happy Working

^_^

Saturday 27 August 2011

Face Matters

Good evening you avid readers! How have your summers been so far? Today has been a lazy day for me, but hopefully tomorrow will be full with plans. I was biking earlier today, and wore an old ball cap. As soon as I started crossing the road, my hat flew off, and the crosswalk timer was running out. By then another car already ran over the hat and took it with it. Poor hat, it never knew that it would end up like that.  Enough ranting about my hat, onto today’s post!


The internet age has opened many doors for those seeking advice, but it has also cause many issues. I feel concerned over the growing number of people that give skin advice over the internet, and I must say, that it can get unsettling. Suggestions get thrown around, and they are often ones that can lead to bigger problems. An example of this is ways you can treat acne without having to buy any medicated lotions, wipes, or exfoliators. One “remedy” I see all the time is to use toothpaste containing baking soda. I am not a dermatologist, but I can certainly tell you that this is something that will irritate your skin. Just because you cannot feel the irritation, it doesn’t mean that it is not irritating and causing damage to your precious skin. Another remedy I recently found out, was to place stinging hydrogen peroxide on your skin. It does not seem very safe to me, and I do not specialize in chemistry or biology (yet). All I am typing out is that you should always take online advice with a grain of salt. Yes, acne can go away on it’s own, or can be relieved with simple homemade solutions, but please take caution when trying anything on your skin. Lemon juice may seem safe to use, but it can cause irritation as well. I am wary when it comes to taking advice from aestheticians, as some do not have the proper knowledge about the various layers of the skin and the science behind the many skin treatments. Going to a doctor with worrying questions is the best way to go, as they went to medical school for a reason. Take care of your skin, and remember to always ask your doctor, they will be more than happy to answer any gnawing concerns.


If any of you readers ever have any concerns or need to point out any flaws in any information I give, please be free to contact me through twitter (@electric_blush), the comments section below, or even on the Electric Advice Page. I will not be offended, just glad to know that there is something I can improve on to ensure that I do not display false information to any of you. Don’t be shy; you will not be negatively confronted. Well, see you tomorrow.


Happy Testing


^_^

Friday 26 August 2011

School Pictures Tips


Hello all of you readers! How are you doing? I am back from my trip, and I have a few reviews and tutorials planned out for you all. It makes me cringe to type this, but with only a few days of August left, there is little time to hang out with the people you haven’t gotten around to, or stay up until six in the morning every day. September is right around the corner, and if you are like me, then you have to attend school this coming Monday. School is exciting for the first few weeks, then its back to the sleepless nights, and fretting about overdue papers. Enjoy these few days while you can, and hopefully you readers are part of the lucky ones that get to attend next later than the rest of us. Well, onto today’s post!

 Registering for school may be on the painful side, as you have to line up multiple times, and wait for hours before you can finally leave. By the most of the good lockers are taken and the textbooks are reduced down to the “gently-used” editions. The most tedious yet exciting part of registration has to be school pictures. A lot of preparation goes into getting your look right for the photo, but when you look back on it all, it might seem a bit silly. For now, enjoy your time being in school, and worry all you want, as this post is full of ways to get your picture looking clean, simple, and memorable.

Tip 1: If you do wear makeup for the photos, avoid makeup setting powders that contain mica. Mica is known for its reflectiveness, and can cause while patches to show up on your face from the camera flash.

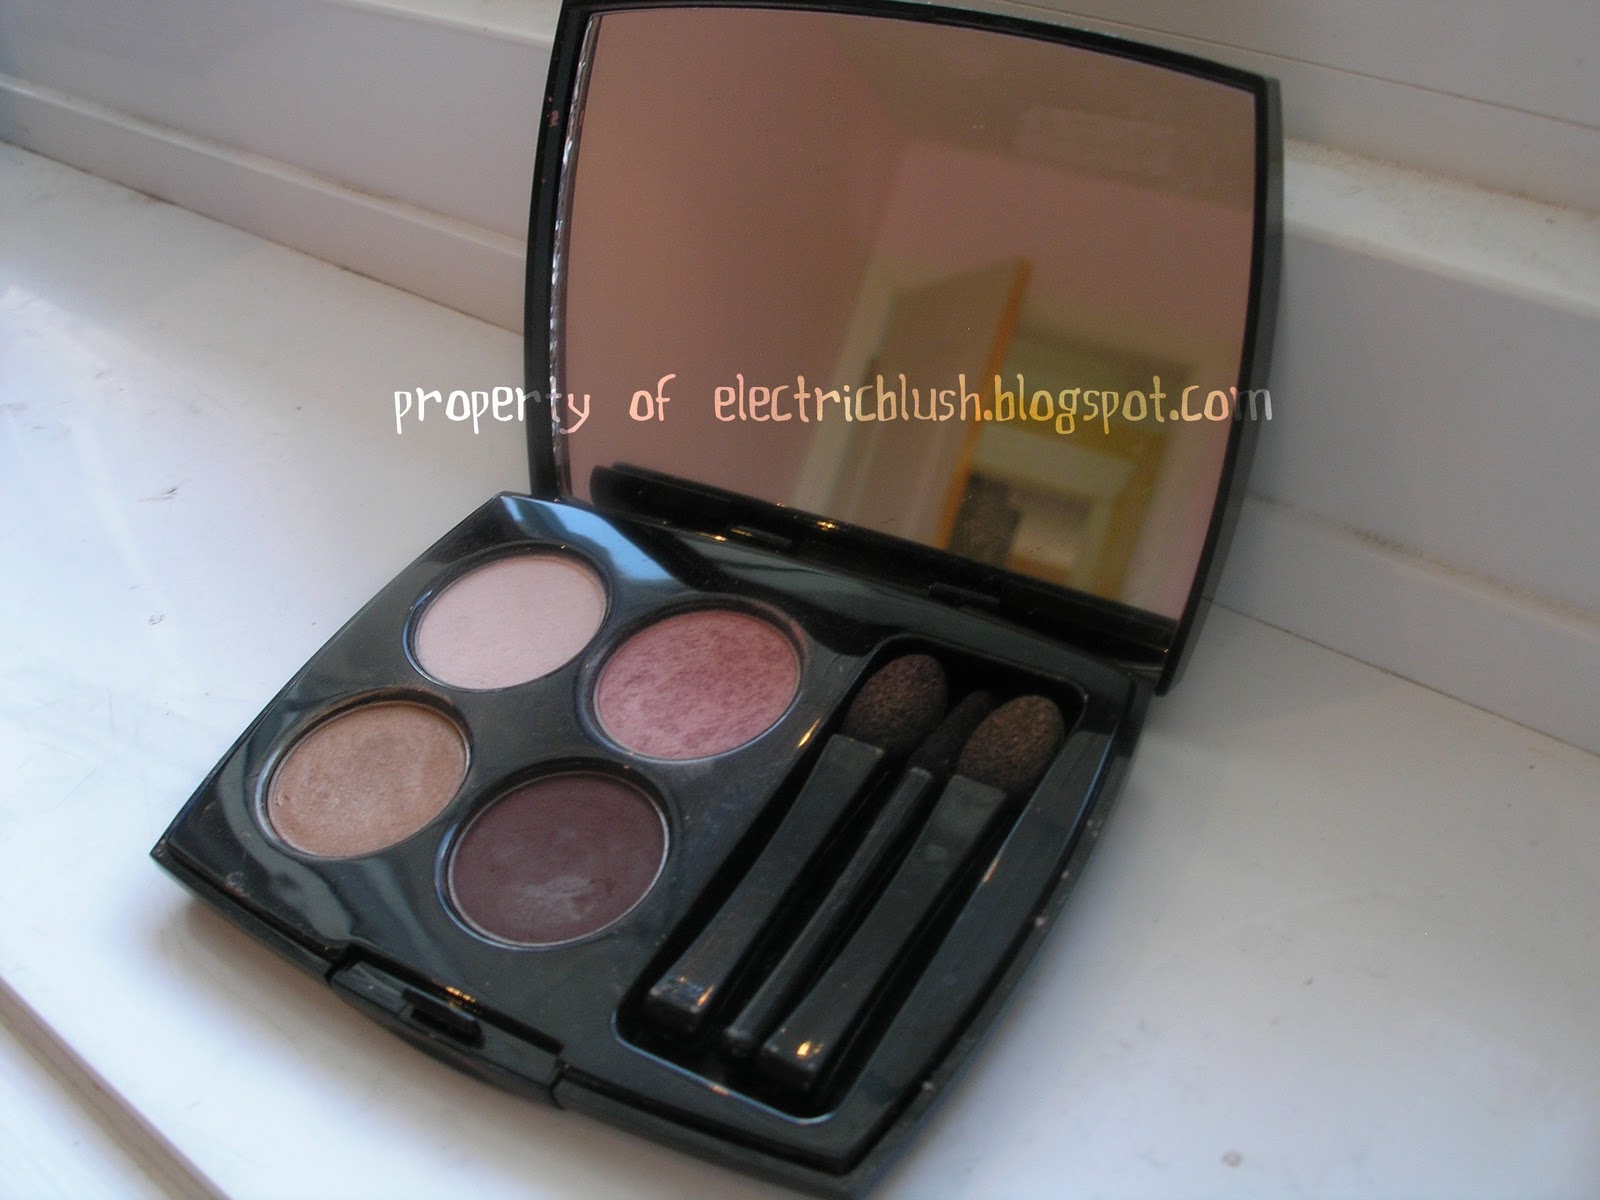
Tip 2: For eyeshadow, only wear colours that you will not regret putting on your face for the photo. If in doubt, try natural looking colours, for a fresh looking face. Colours like a tan brown, taupe, or even a light wash of gold look good on any skin tone.

Tip 3: If you want a little bit of sparkle, wear sheer but light colours, instead of all matte ones, which can make the eyes appear flat. If using more than one shade, use a sheer wash of colour, and matte colours for contouring and the undereye area.

Tip 4: Avoid wearing too much blush. I know many people that pile on the blush, but it can end up looking odd in photos. Instead, gently pat a clean finger into a crème or powder blush, and lightly dot the apples of your cheeks. Blend in the colour, until you can barely see it. Repeat these two steps , and you will have the perfect amount on your cheeks. Blush can help you to avoid looking too pale in photos, as the bright lighting can wash out your face colour.

Tip 5: For mascara, just a couple coats should do. Again, too much product doesn’t mean your look will become more polished. If you are not a fan of mascara, curl lashes and apply clear brow and lash gel, to make then more defined.


Tip 6: Try to keep your makeup light; you only want to cover any imperfection, not your entire face. Concealer should be the only type of cover up you would need for a photo, followed by face powder.

Tip 7: When picking an outfit, you have to consider what will be visible in the photo. If you have the option to pick the pose you want, pick beforehand, so you can get your best picture. It is best to pick something simple, without being too casual. Pick out your outfit the night before and you are all set.

Tip 8: If you are trying to find the perfect hairstyle, make a side part, and gently smooth the hair. Do not flatten the hair; just try to make it appear neater. This is the easiest thing to do with your air for photos, as it looks great on everybody.

Tip 9: Last tip I have before I sign off for the day, is to relax. Even if you do not remember any of this, remember to stay calm and everything will go well. A relaxed smile looks better than a nervous one.

Well, there you have it, nine tips that I hope will get you through picture day. Even if you are not satisfied with your picture, at least you know what to do for next time. I just had my photo taken a couple days back, and the photographer took the photo so quickly, I have a feeling she took it before I was fully smiling. Oh well, I’ll see when I get them. Tomorrow’s post will have a picture of my new braceless teeth. Today’s photos are turning out too blurry, and maybe I will have better luck tomorrow. Hope you like it. Well, I’m heading to bed. Take care everyone, and thank you for reading.


Happy School Registering

^_^

Friday 19 August 2011

Update :)

Hello all you wonderful readers! How are all of you today? It has been a busy week for me, there were people coming and going all week in my house, but it is finally over. I had also been busy writing for a project, which I will be finishing today. Lastly, I will be getting my braces off this afternoon, at 3 pm. That means it will be a three hour appointment. Oh well, I`m glad that they are going to be off right before pictures and school, so its pretty fortunate. I feel frustrated that I did not have the proper time to do any tutorials this week, but fear not, they should be back within a few days time, as I am going out of town again. I will try my best to do tutorials of all sorts while on the run,and if it comes down to it, I will just do informative posts and reviews. Well, enjoy the rest of your week, and I should get back to you later on today.


Happy Waiting


^_^

Sunday 14 August 2011

Muted Metallics

Hello you patient readers! How are all of you?  It has been a while since I last posted, but today I am going to post an eye makeup tutorial for you guys. There will be another makeup look soon, and a brush cleaning tutorial, so bear with me. There are no links in this post. Well, onto today’s post!

This simple look is called “Muted Metallics” as you can wear this slightly shimmery look anytime of the day, and even for every occasion. It has a touch of shine to it, while still looking quite natural and wearable. I used three main shades for this look, plus one highlight. Read
below for the steps!


Step One: Using a clean finger or a Q-tip, apply a slightly shimmery light tan shade all over the eyelids and over the crease area. Gently blend out the edges, and apply more shadow if needed. The palette used is the Lancome Colour Design Eyeshadow Quad in Haute Sunset.


My eye looks dark in this photo because I took it when it was a bit dark in my room :P


Step Two: Using a Q-tip,find the hollows of your eyes,  and gently prod. This is where the next colour is going to go. Load the Q-tip with a matte chocolate brown eyeshadow, and apply to the outer third of the hollows of the eyes, and gently blend the colour outwards.


Step Three: Using a wet/dry eyelining palette, select a shade that is close to the one in the picture. Here I am using the Cargo Wet/dry Eyelining Palette. If you do have this palette, I am using the dark gold-brown colour.  Wet an eyelining brush, and dab off any dripping water. Quickly mix the water with the colour, until the desired consistency is reached.  Make a thin, yet noticeable line close to the upper lash line, and wing out the liner about a five millimetres. Add an extra layer of eyeliner is necessary.


Step Four: Wipe the brush and the palette dry. Selecting the same colour, place along the lower lash line, going two-thirds into the lash line.

Step Five: Smoke the colour towards the inner lash line, and widen the area of the line, slightly. This step balances out the eyelid colours. If you like, add mascara, for a more defined makeup look.


Step Six: Add a touch of a highlighting colour in the inner corners of the eyes, and along the tear ducts. Pat the colour to blend it in.


There you go, a simple look that can be worn anywhere, or for any occasion. I hope that this article helped you to incorporate a new makeup look into the many (or not so many) looks that you already use. A new makeup post will be put up tomorrow, with a picture at the end of my braces, just for a little fun. Thanks for reading and stay posted for more looks!


Happy Trying


^_^

Tuesday 9 August 2011

A Much Needed Update

Hello my patient readers! How are you doing? I was hoping to post the tutorial a couple of days ago, but I was unable to because of the thunderstorms we have been getting in town. The internet connection has not been that reliable, but it is pretty strong now. The post should be put up today, but it shall be done later at night, as I have somewhere to go right now. I found out today that I will be getting my braces off on the 19th of August, and I am pretty excited. I shall post a picture when I get back. Worry not, your tutorial will arrive!


Happy Waiting


^_^

Saturday 6 August 2011

BB Cream


Hello my amazing readers! How are your summers going? Better be “working hard”. I’m just kidding… don’t strain yourself, summer is for playing, not working. I decided to make an informative post today, and deviate from what I usually post about. Do not worry it’s going to be makeup related, and I’m assuming some of you may need this post to decide on whether you should buy this type of product or not.  A lot of photos were copyright protected, or were from other people blogs, so instead of showing you a photo,  I decided to post the link to Skin79, a popular BB Cream brand that has a North American website, with the list of North American retailers. look for the link at the bottom of the page, and please note, that the retailers are Korean and Chinese stores, located in Chinatown, Koreatown, or even the Pacific Mall. Well, onto today’s post!

By reading the title, you can already assume what this post is going to regard: BB Creams. I have not tried one myself, as this product has not entered the mainstream market here in North America, which makes it hard to find, therefore overpriced. You can probably find it in any specialty Korean, Chinese, or Japanese beauty stores. Rumours have been swirling around that the Body Shop may release their own version of a BB cream soon. M.A.C supposedly has a product similar to BB Cream, but I am not interested in it. I would purchase or request a sample online, but I am a bit wary about leaving my contact information floating about cyberspace. I will try to get my hands on some soon enough.

The official name of this product is actually “Beblesh Balm” or “Blemish Balm”. I did a bit of research and found its origins in Germany, as something meant for post-operation skin surgery patients, but became a cosmetic necessity for many people living in Asia. In countries like South Korea, BB Cream can be found in the majority of the makeup stores, each with their own types and features. BB Creams are usually light and airy, with the moisturizing power of a face lotion, the coverage of a concealer and foundation, and the acne diminishing powers of a stellar beauty regime. They are also supposed to promote skin regeneration, which can improve the overall appearance of your skin. Also, this miracle product also acts as a sunscreen, and evens out redness and improves your skin tone. However, there is a bit of controversy over the skin whitening feature present in some BB Creams, which has many experts fretting over the idea that it can cause cancer. I would look into this further, before considering buying BB Cream.
 
Now, I would like to go over the pros and cons of this all-in-one product:

Pros: 

  •  Effortlessly covers skin imperfections such as acne, dark spots, acne scars, and even freckles in some people
  • Evens out skin tone
  • Provides great skin coverage, without the use of a concealer or a foundation
  • Many brands available, with many price ranges
  • Comes in many finishes, such as Matte or Shiny
  • Built in sun protection
  • Many BB Creams are oil-free
  • Some BB Creams are formulated to not break out acne prone skin
  • Many promotes skin regeneration, for the appearance of healthier skin
  • Some BB Creams help to fight against some signs of aging
  • Can be bought online, as many brands have world wide websites


Cons:


  • Some brands only offer two shades, so darker skin tones might have a hard time finding a suitable BB Cream
  •  BB Creams often are sold in smaller amounts than a foundation would be
  • It is mostly sold in Asian countries, rarely found in Canada and the United States. Try looking in Koreatown or Chinatown, if you live in a large city, or Pacific Mall if you reside in Toronto, Canada
  • There is that aforementioned risk of it being a carcinogen, but I advise you to look into it yourself or ask a dermatologist for their approval       
  • Be wary of fake products being sold, always check the official websites for approved retailers for your country, in available
  • Many unofficial online retailers, try to stick with the official websites when purchasing


SKIN79-Official North American Website


Well, the choice is now yours, and I hope that this little post helped you become informed about a growing makeup trend. I am planning on posting a makeup tutorial tomorrow, so stay posted. If any of you readers have tried or want to own BB creams, what brand would you buy?


Happy BB Cream Testing


^_^