 |
| Source: sephora.ca |

Showing posts with label eyeshadow. Show all posts
Showing posts with label eyeshadow. Show all posts
Saturday, 1 September 2012
Fall Makeup Trend: Neogrunge Makeup
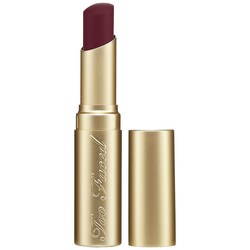
Hello my feisty readers! Fall makeup is looking very reminiscent of past trends, and one that particularly stood out to me was the comeback of grunge elements in this year's looks. I was flipping through a few magazines, and even noticed a few people on the streets wearing daring shades of lipstick that was more commonly found in the 90's.Rich chocolate browns and brownish plum lipsticks of yesteryear. How about you readers? Would you ever rock this past trend? Who knows, it may last for the rest of the winter.


Thursday, 9 August 2012
Anabelle Studio Custom Eyeshadow Quad Review
Hello my jubilant readers! I hope you are all enjoying those wonderful moments out in the sun, and just soaking it up. Of course, you would wear sunscreen. All prosecuting aside, today I am going to review a few products from a favorite brand of mine. I was in a supermarket out of town, just picking up some snacks before I head back home, and I decided to take a peek in their makeup aisle (like a true fan of makeup), and I spotted the Annabelle display. I am a regular buyer of their cosmetics, but for some reason, I never actually tried their custom quad palette or the shadows. It was just my luck, as the durable, magnetic palette was around $2.49, and each individual shadow was only $1.99! It was a bit surprising, as they sell it for the full price in my hometown, so why not give it a try?
The custom palette has a technicolor pattern of graffiti laid over the clear case of the compact, and the backing is a nice solid black. It can fit up to four shadows, and each pace is lined with magnets. I find its very easy to pop the shadows in and out of the palette, so there is no cracked eyeshadow or ruined carpets from trying to pry out the shadows. Its also a nice-sized palette, not to bulky or too small.
I picked out four shadows, just to try them out. This first colour is a nice jewel-tone dark green shadow, called "Rainforest". As yoo can see in the photo, it has just the right amount of shimmer,which makes it very wearable even in the day. This is one of my favourite shades of green, as it looks flattering on most skintones!
The next colour I chose was "Divine Diva", a pretty mauve-y/ purple-brown shade.. I already own a similar colour, but this one has a bit more appeal, as its nice and warm toned, and looks great on its own or paired with other shadows. This is usually my go-to colour when I 'm in a rush.
The third colour I chose for my palette was an ethereal lagoon-blue called "Fantasy". I love this colour, its so graceful yet daring all at once. I definitely recommend you readers to go and try out the colour for yourselves!Just like the awesome green eyeshadow, it has just enough gentle shimmer to be able to wear it during the day.
The last colour I bought, reminds me of liquid gold. It literally oozes metallic coolness, daring anybody to give it a try. I love this shade of gold, its not too loud, or too glittery, "Gold Digger" has great colour payoff and did not crease when I applied it.
The verdict:
These eyeshadows are definitely on par with a few of the higher end brands you may encounter. They retain their vibrancy well after they are first applied to the skin, and fade nicely into the later hours of the day. I think they do pretty well for drugstore shadows, and might even be just as good as dupes for a couple MAC shadows or even STILA ones. I love ho these are extremely affordable and budget friendly, for all those students and makeup junkies out there. So what are you waiting for, go down to your local drugstore and try out the testers if you can! Another plus, is that this brand is Canadian, which might persuade all you dedicated Canadians if that won't do the trick, all of these products are cruelty-free, containing no animals or animal-by products. Annabelle Cosmetics is a canadian brand that sells in all major drugstores, such as Shoppers Drugmart, and London Drugs, and all major grocery stores, such as Sobeys.
Thank you for reading, I hope this post proved to be helpful. Until next time!
Happy Reading
^_^
fantasy, golddigger,
Friday, 11 May 2012
Trend Update: Ombré 2.0
Hello my dazzling readers! How are you, on this fine day? This is the time of year, where spring and summer beauty trends collide, a time where any trend can be pulled off, and every colour is in style. I try not to follow trends too closely, I just buy whatever I admire. This just happens to be one trend that I've always liked. You may have seen this trend earlier on in the year, or even last year, but this new updated version appears to be more fresh and trendy. Its easy to pull off, and their seems to be an unlimited number of shades an styles to choose from, which is always a plus. Below are a few of my favourite ways to incorporate this amazing trend.

This is an easy way to participate in this trend. it can easily be created using safe, neutral colours, or vibrant, opaque ones. I might do a tutorial on this, as I adore this incorporation of the ombré trend.
Ombré Eyeshadow
This is another great way to utilize this trend. This style seems to always be in fashion, but it never hurts to try it out anyways!
Clothing
Here are a few pictures of ombré clothing that I thought were really cute.

That's all for today! I hope you all try out this trend. The best thing about this trend, is how you can incorporate it into your look, without having to worry about how you incorporate it, Well, I'm off to bed now, I have to get up early tomorrow. Stay tuned for the next post!
Happy Waiting
^_^

That's all for today! I hope you all try out this trend. The best thing about this trend, is how you can incorporate it into your look, without having to worry about how you incorporate it, Well, I'm off to bed now, I have to get up early tomorrow. Stay tuned for the next post!
Happy Waiting
^_^
*All photos belong to their rightful owners
Thursday, 1 March 2012
Pretty Spring Pastels Tutorial
Hello my wonderful readers! How are you all doing? Today feels like a tutorial day, so be prepared for the new look I came up with. I am off of school for about 10 days, because of the Teacher’s Convention so stay updated on upcoming posts. I hope you enjoy wearing this look, as I had a bit of fun making it. Keep scrolling down for the details, and feel free to give your opinions about this look after you finish reading. Well, onto today’s post!
As spring is slowly making is appearance, it’s good to keep a few soft, pastel looks in your repertoire. Now is the perfect time to incorporate these feminine yet bold looks. I am going to be using a palette that I previously reviewed, as I believe that this palette is perfect for spring, because of the modern shades of teal. The main palette I am using is the Lancôme Paris Colour Design: Eye Brightening All-In-One 5 Shadow and Liner Palette ($54.00 CAD), in Teal Fury. Let’s get started!


Step 1: Before you apply any eyeshadow, prime your eyelids, to reduce creasing. Instead of using an actual primer, I am going to use a little bit of foundation. This was a sample I obtained from a Lancôme counter. The colour was too a couple of shades too dark, and was on the yellow-ish brown side. It worked out perfectly, as it did a splendid job of covering my dark circles.
The foundation was the Lancôme Teint Miracle Foundation ($44.00 CAD, department stores)

Step 2: The second thing you are going to do, is apply a sheer crème eyeshadow all over you eyelids, gently patting the eyeshadow onto the lids, then gently blending it out with a clean finger. Using a sheer crème shadow can help prevent creasing of the main eyeshadow colours, while making blending the shadows much easier. Try: Revlon Illuminance Crème Shadow in Va Va Bloom ($ 8.87 CAD, drugstores)

Step 3: Choose a teal-green eyeshadow, and apply it to the outer two-thirds of your eyelids. Gently blend the shadow, on the outer corners. Also, blend the shadow with the peach créme shadow, creating a soft gradient effect. This is the look you want to achieve, with a very soft, approachable eyeshadow combination. Bring a bit of the colour down to the lower lashline, and blend it out.

Step 4: To brighten up the eyes, line your lower waterline with a white eyeliner pencil.To achieve maximum results, gently dab a Q-tip along the lower waterline, to absorb any fluid, and then apply the liner. The white liner will give the illusion of larger, and much brighter looking eyes.Make sure you are using a matte pure white eyeliner, it gives a more natural effect. I used The Body Shop Eye Definer in 05 White ( $11.00 CAD, The Body Shop).

Step 5: The next step, is to line your upper lashline. Use a dark brown eyeliner, as it looks more natural than a black eyeliner. Make a thin line starting from the inner corners, and make a small tapered wing at the outer corners, blending out the line when you finish. Make tiny swift dots with your eyeliner on your lower lashline, working from the outer part, until you get one third of the way lined. Gently pat the liner to blend it. This creates the appearance of thicker lashes, and a slight change in the shape of your eye. The liner used was the Lancôme Le Crayon Khôl in Black Coffee ($28.00 CAD, department stores)

Step 6: To finish off this simple and fresh look, use a thin coat of black mascara, to seal the deal. Coat the top lashes, and put the remainder of the mascara on your lower lashes. I used Lancôme Hypnôse Drama in Excessive Black ( $31.00 CAD)
Well, there you go! A simple, and clean eyeshadow look, perfect for spring. This is just one of the Spring looks I came up with, so keep staying up to date, for the next one. Enjoy the rest of your day everyone! Thank you for reading.
Happy Springtime
^_^
Wednesday, 18 January 2012
Lancôme Colour Design: 5 Shadow and Liner Palette Review
Hello my wonderful readers! How are you? Today is a product review day, and I chose one of my most favorite palettes to date. The full name of the product is the Lancôme Paris Colour Design: Eye Brightening All-In-One 5 Shadow and Liner Palette. Phew! Other than being known for exquisite cosmetics, Lancôme is also known for the long names of their products. All cheesy jokes aside, keep scrolling down to read my full review on this product. Well, onto today’s post!
This palette first caught my eye when I was browsing around the makeup counters at one of The Bay department stores. It was a few minutes to closing, and I saw this palette and loved how the colours looked. You do not find many people wearing teal-green shadows anymore, but I believe that more people would change their mind about those colours if they took a look at the palette. I only recently saw a few other cosmetic brands posting advertisements with teal and blue eye shadows, which made me feel happy to see them. These modern shades of teal are perfect for transitioning from winter to spring (or if you live somewhere cold like me, winter to even more winter!). I am a big fan of Lancôme, as their products never fail to impress. This palette has a lot to offer, and I hope you all feel the same way after reading my review.


The first feature that deserves attention is how they give you a lot of eyeshadow to experiment with. I have two other Lancôme palettes, and both of them are only half-finished, as they give you a fair amount of product. This palette is different from the other two, as this one numbers each of the eyeshadow steps, with a number.

As soon as you open the box, you will find a folded instructions booklet. One side shows you how to achieve a wearable “day” look. The reverse side will show you how to achieve a “night” look. This is a very useful resource for those who are just starting out with makeup.

As soon as you open the box, you will find a folded instructions booklet. One side shows you how to achieve a wearable “day” look. The reverse side will show you how to achieve a “night” look. This is a very useful resource for those who are just starting out with makeup.

The instructions and numbered steps is not why I had bought the palette. It was purchased because of the beautiful colours, and how they look flattering on a lot of skintones. I was a bit worried that the colours would not look very flattering on my skintone, but as soon as I applied the bright teal shade to my lids, I loved the way it looked. Here are the swatches for all the colours below:


Another great feature of the palette is that every shade is numbered 1-5, so you know which one to apply. Another thing I would like to compliment is how the shades (like always) are smooth, and not chalky, and do not crease on me. Also, they are all perfectly pigmented, not too bright, and not too subtle. You can easily amplify the brightness with another layer of colour for a more dramatic effect, but I believe the colours make the right amount of impact as it is.
I would definitely recommend buying this palette, especially during the winter season, as you will get a lot of chances to experiment with the colours, as they just scream winter glamour. Pictures will go up; I just have to keep studying, for the time being. So go to your nearest Lancôme counter and try out the palette for yourself! Well, there you go! Thank you for reading this post, and enjoy the rest of your day.
Happy Studying
^_^
Monday, 31 October 2011
Halloween Posts Five,Six, and Seven
Hello all my wonderful readers! How are all of you? I am still having camera troubles, but I am not giving up on posting the looks that I promised. I actually have a third look for you all, my criminal costume makeup look. They are all fairly easy, so I will make this 3 posts in one blog post, to make up for lost time. Technically, this is like 3 separate blog posts, just on one space. Stay on this page to see all the written instructions! Well, onto today's post!
Look #1: The Vampire Look
Vampire legends have been around for centuries. No matter how old the legend is, it seems to bring chills and excitement to anybody that hears them, though they may not believe in the idea of blood-sucking hooligans. I chose this look, as this was my original costume for Halloween, until I changed my idea another five million times. Oh well, at least this look will be put to good use. Let’s begin.
Step One: Find a sunscreen that makes you look really pale when applied, and put several layers on your face and any exposed skin. Tap a pale face powder over this to set the cream, and enhance the paleness.
Step Two: Skip prepping your eyes with any type of coverup, which includes foundation, concealer, and even powders. If you want to use coverup, nothing’s stopping you.
Step Three: Find the blackest eyeshadow you own with metallic flecks in it, to add a bit of dimension. Sweep this up all over your eyelids, all the way over your crease. Use a soft blending blush to blend, and drag a bit down into your lower lashline from the blending brush.
Step Four: Using a rich dark plum eyeshadow with gold flecks, lightly dust a small amount of the shadow into the center of the lids, and gently diffuse the colour outwards. Do not go past the outer or inner part of the eyelid. Layer a light dusting of this shadow onto the lower lashline where the black shadow was placed. Gently blend it past the black. This will give you that sleepless look that is often associated with vampires.
Step Five: Find a jet black pencil liner meant for sensitive skin, and line the whole rim of your waterline.
Step Six: This step is optional, but you can use a deep shade of blush to contour the features of your face. If done the right way, you can look as if you are a true vampire.
Step Seven: If you have false lashes, now it the time to put them on. Seamlessly blend them into your natural lashes by curling your lashes, and then place the false lashes on. Finish this off with the blackest mascara you own.
There, look number one if finished! Scroll down to see the other looks.
Look #2: The 60-Second Cowgirl
This look deserves the above title, as takes only that long to achieve this look. Read below for instructions.
Step One: Prep the eyes with a natural looking concealer. Blend it gently, by using your ring finger.
Step Two: We want to achieve a nice girly eyeshadow look, so grab a slightly sheer peach colour and put it all over your lids, and blend it a little bit over your crease.
Step Three: Using a light lavender eyeshadow, apply along the outer lid, following the natural contours of your eye socket. Gently blend it out, and apply another layer if you wish. Drag a bit of the colour down to your lower lashline, and blend it towards the center of your lashline.
Step Four: Finish by applying the darkest mascara you have on both the upper and lower lashes. If you like, quickly apply a thin layer of blush on the apples of your cheeks.
There you go, you are now ready to assemble the rest of your cowgirl costume, and enjoy Halloween!
Look #3: Criminal Fashion Makeup Look
This look is sure to make you look like the stereotypical female criminal, but with a chic edge. Just as a note, I do not support this choice of lifestyle, or the choices individuals make to end up as criminals, this look is for fun, so please do not take it seriously. I only want you guys to have fun and be creative. Do not worry if your makeup is smudged too much, as you can always touch it up with a bit of face moisturizer to soften it up. Let’s start!
Step One: You will want to skip the concealer, as this look is supposed to suggest a lack of sleep, and exude a sense of roughness.
Step Two: Find a shimmery light-brown eyeshadow, and sweep it all over your lids a little bit over your crease. Extend the shadow around the outer lid, and blend into a “cat eye” shape, by rounding out the outer edges.
Step Three: Using a brownish-gold eyeshadow, sweep it into the outer part of your crease, and smoke out the shadow. Heavily apply it onto your lower lash line.
Step Four: Find a black pencil eyeliner, and draw on the back of your hand a few times to warm the product. This will make it easier to apply. Carefully draw yourself a cat-eye, making the line gradually thicker as your work your way from the inner part of your lashline to the outer. Flick out the end of the pencil to complete the cat-eye. Finish with mascara and you are now done.
There you have it! Three easy looks you can use for Halloween and maybe everyday wear if you tone it down. My next post might not be for a while, as November is always busy for me, so keep checking in for the next post. Thank you for reading!
Happy Halloween
^_^
Friday, 28 October 2011
Halloween Makeup Tips
Hello my marvellous readers! How are your costumes going? I hope you are having fun putting them together. As I said before, this post is part of a seven post series that is just for Halloween. This one is going to be just for some tips I came up with that should help out a lot of you during kid-scaring season (please don’t scare them too much ).Well, onto today`s post!
Halloween is one of my favourite times of the year. I am planning on going out on Halloween, so it should be really fun. When I was younger, I remember putting on a million layers of clothing, and a puffy winter jacket under my costume. Why? I live in a place where winter weather arrives quickly after “autumn” (still pretty cold), and snow usually starts in the last weeks of October. A few of the people that gave out candy had trouble figuring out all the kids’ costumes because of all the bulk. Hopefully, none of you will have to deal with that issue. If you are planning on dressing up this year, try using any of the following tips:
Tip #1: If you cannot find the perfect shade of “living-dead” white for face paints, try using a sunscreen with a high SPF. From experience, I can tell you that applying thick layers of sunscreen can make your skin appear unnaturally pale, so pile it on until you reach the perfect shade.
Tip #2: To get the extreme smudged eyeliner look, use mascara, and dab a few dots all around your upper eyelids and lower part of your eyes. Blend slightly, and add another layer. Spritz a bit of water all over your eyes, to make the mascara run. Lastly, gently dab the smudged “liner” with a tissue, and pat a bit of matte black eyeshadow over it. Blend the eyeshadow and you’re all set.
Tip #3: If you want to make your facial features stand out or not stand out as much, try contouring your face with a matte light chocolate eyeshadow. Gently swirl a blending brush into the colour, and begin contouring your face. Use a sponge or a blush brush to gently blend the colour into your skin, but do not over blend. A general guideline for skin tones is to use a brown eyeshadow that is a few shades darker than your skin.
Tip #4: Stock up on drugstore eyeshadows during October. Matte colours are the most versatile for Halloween makeup, as you can create realistic looking cuts, bruises, contour your face as mentioned, and also create numerous zombie looks. If you are on a tight budget, I would recommend either Revlon’s matte eyeshadows, or Annabelle. They both have a large range of mate shadows ad should last throughout the night.
Tip #5: Halloween is also the best time to shop for false lashes, in my opinion; they always have the best designs around Halloween. If you are in a hurry to find the right makeup look, grab a pair of feather lashes, and a few crisscross lashes, and layer them however you like. I am sure you will like the effect.
Tip #6: The last makeup tip of this post is to look in your kitchen cupboard for anything that you can use. Just make sure it is safe to use in skin. If you are not sure, just stick with food colouring, flour, and Kool-aid.
There you have it, a few tips that I hope can help you for your costumes. Even if you do not plan on dressing up this year, why not give them a try? I’m still deciding on my costume, but I’ll find something. Well, stay tuned for the other post. Thanks for reading.
Happy Experimenting
^_^
Friday, 26 August 2011
School Pictures Tips
Hello all of you readers! How are you doing? I am back from my trip, and I have a few reviews and tutorials planned out for you all. It makes me cringe to type this, but with only a few days of August left, there is little time to hang out with the people you haven’t gotten around to, or stay up until six in the morning every day. September is right around the corner, and if you are like me, then you have to attend school this coming Monday. School is exciting for the first few weeks, then its back to the sleepless nights, and fretting about overdue papers. Enjoy these few days while you can, and hopefully you readers are part of the lucky ones that get to attend next later than the rest of us. Well, onto today’s post!
Registering for school may be on the painful side, as you have to line up multiple times, and wait for hours before you can finally leave. By the most of the good lockers are taken and the textbooks are reduced down to the “gently-used” editions. The most tedious yet exciting part of registration has to be school pictures. A lot of preparation goes into getting your look right for the photo, but when you look back on it all, it might seem a bit silly. For now, enjoy your time being in school, and worry all you want, as this post is full of ways to get your picture looking clean, simple, and memorable.
Tip 1: If you do wear makeup for the photos, avoid makeup setting powders that contain mica. Mica is known for its reflectiveness, and can cause while patches to show up on your face from the camera flash.
Tip 2: For eyeshadow, only wear colours that you will not regret putting on your face for the photo. If in doubt, try natural looking colours, for a fresh looking face. Colours like a tan brown, taupe, or even a light wash of gold look good on any skin tone.
Tip 3: If you want a little bit of sparkle, wear sheer but light colours, instead of all matte ones, which can make the eyes appear flat. If using more than one shade, use a sheer wash of colour, and matte colours for contouring and the undereye area.
Tip 4: Avoid wearing too much blush. I know many people that pile on the blush, but it can end up looking odd in photos. Instead, gently pat a clean finger into a crème or powder blush, and lightly dot the apples of your cheeks. Blend in the colour, until you can barely see it. Repeat these two steps , and you will have the perfect amount on your cheeks. Blush can help you to avoid looking too pale in photos, as the bright lighting can wash out your face colour.
Tip 5: For mascara, just a couple coats should do. Again, too much product doesn’t mean your look will become more polished. If you are not a fan of mascara, curl lashes and apply clear brow and lash gel, to make then more defined.
Tip 6: Try to keep your makeup light; you only want to cover any imperfection, not your entire face. Concealer should be the only type of cover up you would need for a photo, followed by face powder.
Tip 7: When picking an outfit, you have to consider what will be visible in the photo. If you have the option to pick the pose you want, pick beforehand, so you can get your best picture. It is best to pick something simple, without being too casual. Pick out your outfit the night before and you are all set.
Tip 8: If you are trying to find the perfect hairstyle, make a side part, and gently smooth the hair. Do not flatten the hair; just try to make it appear neater. This is the easiest thing to do with your air for photos, as it looks great on everybody.
Tip 9: Last tip I have before I sign off for the day, is to relax. Even if you do not remember any of this, remember to stay calm and everything will go well. A relaxed smile looks better than a nervous one.
Well, there you have it, nine tips that I hope will get you through picture day. Even if you are not satisfied with your picture, at least you know what to do for next time. I just had my photo taken a couple days back, and the photographer took the photo so quickly, I have a feeling she took it before I was fully smiling. Oh well, I’ll see when I get them. Tomorrow’s post will have a picture of my new braceless teeth. Today’s photos are turning out too blurry, and maybe I will have better luck tomorrow. Hope you like it. Well, I’m heading to bed. Take care everyone, and thank you for reading.
Happy School Registering
^_^
Subscribe to:
Posts (Atom)